
Process Improvement Tools.
Standard Work.
Work Instructions.
Flow Chart templates.
Swim Lane Cross Functional Flowchart.
Value Stream Mapping.
Lean tools.
Yamazumi Chart template.
Time Study templates.
DMAIC tools.
Quality Improvement tools.
House of Quality QFD.
FMEA Risk Reduction.
Root Cause Analysis tools.
Problem Solving tools.
OEE.
Preventive Maintenance.
Skip to main content


How to use your


Work Instructions for


Installation and Setup
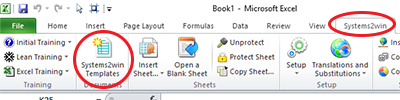
Installation - Each User. Installation - Multi-user. Language Translations. Personalize Your Templates.Systems2win Training.
Quick Start Initial Training. New User Training. Training Matrix. Systems2win Leadership. Training Classes.Lean Training
Lean Training and Coaching. Lean Principles. Muda 8 Wastes. Goal - Lean Flow. Roadmap - Lean Journey. Value Stream Mapping. Standard Work. Hansei Lean Thinking. Lean Dictionary. Online Lean Training. Lean Leadership.Microsoft Office Training
Excel Training. Excel Drawings (without Visio). Excel Charts. Word Training. PDF Training. Document Storage and Naming.Support
Support.Work Instruction Template
also known as Job Instructions, or Visual Work Instructions
A work instructions template
makes people learn better and faster
when they see both written instructions and pictures
Sample Work Instruction template
Sample Work Instruction example
People learn better and faster with Visual Work Instructions
If your company doesn't already own a license, you can Download this Work Instructions template now
Why and When to use your
Work Instructions template
A work instruction template is ideal for
- Training someone who is new to a job
- Training temporaries and/or cross-trained workers
so that your people can take a vacation
without the rest of the work team suffering costly downturns in both quality and efficiency - Official, detailed, written job instructions
perhaps ISO 9000 controlled
Product and Service Families
This Work Instructions template has uncommonly powerful features to (dramatically) save time and reduce mistakes for product families.
In other words, when you need to create (almost identical) instructions for (similar, but slightly different) processes within a product or service family,
then (without this template), you will find yourself struggling with lots of mistakes and wasted time doing redundant data entry — trying to keep many (similar, but slightly different) Work Instructions in sync as things change over time.
Video: Work Instructions
for a stand alone process
or for a Product Family
Watch the video, and follow this link to learn more.
And this Work Instruction template
comes with related Excel templates for
- Analyzing and improving a process
- Making the flow of work visual
- Predicting risk and preventing mistakes
- One-on-one live instructor training
- Supervising and auditing
Use your
Tool Selection Matrix
to choose the right tool
Learn how to choose the right standard work templates
Training
How to use your
Work Instruction template
Work Instruction Videos
- Work Instructions for a standalone process or a Product Family (15 mins)
- Work Instructions video (19 mins)
Additional relevant training
Also learn how to use the many other templates that come bundled with your Work Instructions template
Before you begin using your
Work Instruction template
If you don't yet own it, download your free trial now
Complete the Quick Start Training
Users of this template are expected to have already completed the Quick Start Initial Training so that you know the fundamentals for how to use and find help for ANY Systems2win template.
Familiarize yourself with the training for this template
- on this training web page
- on the Sample and Help sheets in your template
- how to switch languages (If English is not your preferred language)
Your leaders should have already
Every lean tool needs
a corresponding
Lean Coaching System
- personalized your master template
for YOUR company's desired headers, dropdown lists, shapes...
-
organized your systems for folder and file naming
because you won't want to change folder and file names after you start making hyperlinks between related documents
- trained you
using your Cross Training Matrix and your other Lean Management Systems, your leaders should provide one-on-one mentoring for how to use any lean tools and methods
(rather than just giving you a template, and saying "use this")
Get Oriented
Because this is the only Systems2win template that is not WYSIWYG, (what you see is what you get)
you will want to first become familiar with the sections of the workbook where you will do your editing, so watch the Work Instructions Intro video
The data entry sheet is not WYSIWYG
Only the final
generated report
is WYSIWYG
(What You See Is What You Get)
You do your editing on the Master Data Entry Sheet
(the sheet that appears when you select 'Systems2win menu > Open a Blank Sheet')
When done editing, you will click the button to 'Generate Report',
which will generate the final report that you will then distribute to your users as either printed paper or as a PDF
(and that final report is WYSIWYG)
Get Started
Find and open your template
Find and open your Work Instructions template (WorkInst.xlsx)
in the same way that you find and open your other 150+ Systems2win templates.
If you don't yet own a license,
you can download your free trial now.
Save your working document
following the usual document storage and naming conventions established by your leaders
Open a Blank Sheet
When you're ready to start doing your own real work...
click the button to 'Open a Blank Sheet'
Excel Ribbon > Systems2win tab > Open a Blank Sheet
This blank sheet is where you will do your real work
(not on the Sample sheet — which gives you sample data that is extremely helpful for learning how to use your new tool, but is the wrong place to do your real work)
If you are using a template v15.1 R170726 or higher...
then a dialog window will appear, asking:
Do you want the advanced features for Product or Service Families?
If you answer "Yes",
then you will be able to use the advanced features for Product or Service Families.
Empowering you to maintain instructions for the entire family on a single sheet, and then click a button to generate a separate sheet for unique instructions for each product or service — correctly including or excluding steps that are unique to only some products or services in the family.
Greatly reducing redundant data entry and mistakes!!!
If you answer, "No",
then you will have a sheet that is easier to use for a stand-alone process that does not have variations for different products or services.
Learn more about Product and Service Families
Rename your new sheet.
Multiple Sheets
It is common to have multiple sheets in one workbook.
Perhaps one sheet for every product in a product family.
Perhaps one sheet for the 'Run' cycle, and other sheets for 'Setup', 'Palletizing', 'Inspection', etc.
If English is not your preferred language
Switch to your language, just like every Systems2win Excel template.
Work Instructions for
Product or Service Families
What if Our Processes are Similar but Different?
What if most of the steps are the same for most of the items in a product family,
(or most variations of services in a service family)
but a few things are done just a little differently?
Video: Work Instructions
for a stand alone process
or for a Product Family
How do we handle this?
Option 1) Write vague instructions
Rely on tribal knowledge for people to "just know what's different".
And then be willing to live with the increased rework, and the reduced quality, productivity, and customer satisfaction.
Option 2) Maintain Redundant Work Instructions
Make a separate Work Instructions document for every item in the family.
And then be willing to live with the non-value-add time that it will take to reproduce the identical steps in 10 different documents, and the inevitable mistakes as those documents slowly get out of sync with each other.
Option 3) Use your Work Instruction template
When you click the button to 'Open a Blank Sheet',
answer 'Yes' to the dialog that asks 'Do you want the advanced features for Product or Service Families?'
Then in the 'Show' column next to each Step,
leave it blank for steps common to every product in the family,
or enter the ID Code for only those products or services that have that Step.
And then when you click the button to 'Generate Report',
it will correctly hide or show only the correct Steps for each item in the family, and will correctly renumber and reshuffle the Steps, and it will enter the correct data in the header fields at the top of each sheet...
so that you can easily maintain detailed Work Instructions for every product or service in a family with much less redundant data entry, and far fewer mistakes.
What if we don't make products?
A 'Product Family' can also be a 'Service Family'.
Perhaps most Steps are the same for a group of hospital procedures, but just a few things get done differently for this type of lab test vs. that one.
Or perhaps most steps are the same for processing back office transactions, but just a few things get done differently for this type of purchase order vs. that one.
EVERY process can (and usually should) be documented with thorough Work Instructions,
and 'Product Families' are a pretty common challenge faced by just about everyone.
Improve ANY process
in ANY industry
Now you are ready to start using your
Excel template for Work Instructions
Enter your Header Data
On a copy of your blank 'Template' sheet,
scroll to the right to find the section where you enter your header data
Near the top of the sheet... scroll right...
(See screen shot)
If your leaders haven't yet personalized your master template
(as described in personalize section near the bottom of this page)
then you will want to hide header rows that you don't need
(Hide unused header rows; don't delete them)
If no Product Families
If your sheet does not have the special features for a Product or Service Family,
then you can simply edit all header fields in the top section of the worksheet
Product Families - Shared Header Data
If your sheet has the special features for a Product or Service Family,
then the data for header fields marked with an asterisk (*) must be shared by many (perhaps all) sheets in the entire workbook (remember, there will soon be separate sheets for every product or service in the family)...
and the way to do that is to edit the ID Table on the DV sheet.
In the Shared Data Table on the DV sheet
Data is required in the top row
for the overall Product Family
Data is optional in the table (below the gold column headers) for:
- Products or parts in a product family
- Any types of services or customer deliverables

Learn more - how to use your Shared Data Table for product families
Take a moment to think
Especially if you are creating Work Instructions for a service process, take some time to think...
- What are some steps that might be different when we "do it this way, rather than that way"?
- Are there different users of these instructions - that might benefit from having their own sheet (that is somewhat different from the other sheets)?
- In addition to products or services (with their own ID Codes in this ID Table), do you also plan to use the feature to optionally Hide or Show Tips?
Taking a few moments now to think through your potential ID Codes can save you a lot of time before you begin to wade into the details of writing your Work Instructions.
Observe the process
Observe the process,
using one of your Time Study templates
Document your Work Instructions
Start with Major Steps and Key Points
To help to clarify your thinking about how to train someone for how to perform the process, perhaps start by using a concept borrowed from the TWI Job Instruction Method to start fleshing out your Job Instructions with only:
- Major steps (in bold)
- Key points (perhaps in colored fonts)
with no other instructional details (yet)
Flesh out the details
After outlining the major steps and key points
add more details (using normal text)
For paragraphs within a cell:
ALT+ENTER
Don't leave any cells blank in the 'Instructions' column
because Step numbering will stop when it reaches the first blank instruction.
(It is okay to leave a cell blank in the Steps/Images column, but not in the Instructions column)
Tip: If you want an Instructions cell to appear blank... enter a single character (such as a period), and make the font color white to disappear.
ISO work instruction template
To make some instructions stand out
You can use fonts and colors and shapes to make some instructions stand out
perhaps to visually highlight different types of information, such as safety tips, supplies and materials, personal protective equipment, etc.
Perhaps your leaders personalized the 'User-Defined Training' section of the Help sheet on your master template to provide guidance for unique ways that your organization uses of fonts, colors, and shapes?
Copy your Favorite Shapes
from the top of the Master Data Entry Sheet (that you're working on)
or from Systems2win menu > Copy Shapes
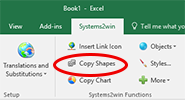
Help for each shape: Right-click > Alt Text
Hide or Show Tips
When you click the buttons to 'Hide or Show Rows, or 'Renumber Steps' or 'Generate Report' for 1 code or All Codes,
a pop-up window will give you the option to 'Hide Tips?'
If you say 'Yes', then it will hide any row where you have overwritten the Step Number with text that starts with the word 'Tip', (or any other text that you specify in the 'Tips Label' field on the DV sheet)
This feature requires version16 release 16 or higher.
For long work instructions
Although you should usually keep your instructions brief...
- You can MANUALLY resize row height to make room for more text.
(by simply dragging the row separator line beneath the row number in the grey margin on the left)
Do not use Row Autofit
or your pictures will be distorted when you copy or move rows
If you accidentally use row autofit, simply manually resize row height.
Default Row Height = 127.5
- If this document will be used electronically...
you can add hyperlinks to related documents
and you can even make active hyperlinks in your ISO 9000 controlled PDF's
- You might refer to one of the Comments text boxes at the top or bottom of the document.
- Use a text box to utilize unused space in the Image column
How? Copy the 'Text box - clear background' shape
(found in the Favorite Shapes at the top of the page)
and then either use that text box instead of an image,
or group the text box along with another image(See example on the Sample sheet of your template)
Add Images
After selecting a cell in the wide column,
click the 'Add Image' button to insert a picture,
which might come from your camera,
or from a computer screen shot
Image Size — as it appears to the human eye
The image will be automatically sized to fit
the default height of 1.7 inches
or the Default Row Height that you overwrote on the DV sheet.
the default width of 2.1 inches
unless you choose Normal Width? = No
in the dialog window
To re-size an image
Simply drag the bottom right corner of the image
If this is a regular image, the proportions will remain correct when you drag the bottom right corner.
If this is a text box, shape, or a grouped shape, then you will need to manually keep proportions correct.
If you made the image bigger than the current cell height...
Do not manually re-size row height to fit image height
Instead, click the 'Renumber Steps' button —
which will automatically increase row height to fit the new image height.
If you made the image smaller than the current cell height...
then it is okay to manually re-size row height.
And if you need more or less room for Instructions, it is also okay to manually re-size row height.
Never use Row Autofit
or your pictures will be distorted when you copy or move rows
If you accidentally use row autofit, simply manually resize row height.
Default Row Height = 127.5, or the value that you override on the DV sheet.
Image Size — megabytes of your Excel file
When adding images to your Work Instructions template, it is VERY important to first use your favorite image editing software to reduce image file sizes
so that the megabyte file size of your Excel file does not become unmanageable.
Learn how to use Excel as a Drawing Tool
You might want to schedule an hour to study our online training and videos to learn how to use Excel as a drawing tool
so that you know how to add arrows and shapes to make your illustrations more clear.
Optional — small shapes
To make your illustrations and instructions even more easily understood...
you can optionally add small drawing shapes, arrows, circles, text labels, safety icons, tool icons, etc.
using Systems2win's Shapes, Excel's standard Drawing Tools, and your own custom shapes.
Systems2win menu > Copy Shapes
Don't Rotate images
If you need to rotate an image, you should use your favorite image editing software
(such as Microsoft Paint, or the free Irfanview).
If you use Excel to rotate an image, it will mess things up when you 'Generate Report'
(unless the rotated image is part of a Group)
Grouped shapes
Each cell can have unlimited small shapes, but only one big image...
unless you Group multiple pictures and shapes together
so that they are treated as one big shape.
(for example a picture within a picture, side-by-side pictures, a picture with a text box, arrows pointing to something within a picture, etc.)
Tips for Grouped Shapes
If you get the error: Permission denied (bFillArrayWithImageData())
then you probably forgot to Group some of your shapes.
Copy, Move, or Delete a Row
To add a row
Use the 'Add Rows' button in the Systems2win menu in the Excel Ribbon bar.
To copy a row
Then select Systems2win menu > Renumber Steps
To move a row
Use Insert Cut Cells
Then select Systems2win menu > Renumber Steps
To delete a row
Be sure to delete any shapes first, before deleting the row.
Caution: If you delete a row without first deleting the shapes, then the shapes will still exist as squished invisible images that might mess things up when you Generate Report.
Step Numbers
Every time that you click the button to 'Renumber Steps',
1) Step numbers are auto-regenerated
2) Row heights are re-sized
IMPORTANT: Do not use RowAutoFit
Skip Steps
What if you want to skip step numbering?
(Perhaps you want to use an extra row to provide additional clarification, or training for a complex sub-step, or an alternative way to do something for special situations...)
Simply enter text in the Images column
Auto-numbering will skip any cell in the Steps/Images column that contains text that does NOT start with the same text as the Step Label field on the DV sheet.
The default Step Label text is "Step", but you can change the word(s) for the Step Label that appears before the number.
(perhaps you prefer the word "Task", or perhaps some other language). Learn more.
Add Rows
To add a row
Click the button to 'Add Rows'

This feature is new as of June 2015.
If using an older version, simply copy an existing similar row.
Tip: Your new row will be a copy of one of the hidden rows, that can be easily personalized by your leaders.
Either: 1) A row for Working Data, or
2) a Header Row for a Page Break
To add a Page Break Header Row
Why use a Page Break Header Row
When you click the button to 'Generate Report', there will be a page break wherever you inserted a Page Break Header Row, and at the top of that new page, you will see whatever you entered in your Page Break Header Row.
When to use a Page Break Header Row
- Precheck (before starting process)
- Shift Setup / Breakdown
- Inspection
- Any major segment of a process that deserves a section break
How? In the Systems2win menu in the Ribbon bar, click the button to 'Add Rows'
then select the radio button for 'Page Break Header Row'
then edit the large merged cell
You can resize this row, enter multiple lines of text, use every formatting trick you know, include images...
You cannot, however, leave a Page Break Header Row blank. It must contain at least one character of text.
If your leaders personalized your master template
with a library of several types of rows commonly used in your organization,
then they should also provide you with one-on-one mentoring for how and when to use each of those (user-defined) types of rows.
If this advanced personalization capability sounds interesting, contact us to learn how
Hide/Show Rows
Optional feature for Product Families
Do you have Product Families?
with products that are very similar, but slightly different?
No? Then simply don't use (or hide) the 'Show' column,
and when you select Systems2win menu > Generate Report, choose the radio button for 'All Rows' or 'As Is'
Yes? Then you will save a lot of time
and reduce a lot of errors by using the 'Hide/Show Rows' button
to quickly hide or show rows containing work instructions that are used by some (but not all) products within your product family
When you click the button to 'Hide/Show Rows'
you have the choice to select the radio button 'For All Rows'
or 'For Selected Code'
to show only rows that contain the code that you select from the dropdown list of codes that you or your leaders defined on the DV sheet
Which rows get hidden and unhidden
In the 'Show' column...
- if the cell for that row is blank,
then the row is shown - if the cell contains a match
for your currently-selected 'Show' code, then the row is shown - if the cell for that row starts with !NOT,
then the row is shown only if your currently-selected 'Show' code is NOT one of the codes the follows !NOT
If you are using a keyboard that does not support English characters, then there is an undocumented feature that allows you to specify some other phrase other than '!NOT'. Contact Systems2win for assistance.
Hide or Show Tips
There is also another feature to Hide or Show Tips
Step Renumbering
When you use the 'Hide/Show Rows' button,
notice that it also automatically Renumbers Steps based upon which rows are now unhidden.
Generate the Report
Click the 'Generate Report' button
to automatically create a work instructions sheet in WYSIWYG format (what you see is what you get)
This is the end deliverable that will be printed
(or distributed in PDF format)
You usually DO NOT EDIT any generated report sheet,
because all of your changes will be lost the next time that you 'Generate Report'.
Page Setup
The auto-generated sheet will copy all of your Page Setup decisions from the source sheet
including your personalized page footer, Landscape vs. Portrait, etc.
If not using 8 1/2 x 11 paper, you can change your paper size
you can print on ANY size paper that Excel supports.
(perhaps use your plotter to print wall paper?)
If you are personalizing your master template,
be sure to configure Page Setup the way you want it to be for your default settings
When you click the button to 'Generate Report', you then choose one of four radio buttons:
- 'As Is' generates a single report worksheet with the rows that are currently unhidden
You will want to manually rename the new worksheet that gets generated.
- 'All Rows' generates a single report worksheet for All Rows
(including rows that might currently be hidden)
The name of the generated sheet is the same as the name of the source sheet, but followed with '-R'.
For example, if the name of your source sheet is "Inspection", the name of the generated report sheet is "Inspection-R"
If you have Product Families
with products that are very similar, but slightly different
then you will save a lot of time and reduce a lot of errors using the next two options
- 'Rows that contain this code' generates a single report worksheet
for the code that you select from the dropdown listThe name of the generated sheet is the same as your selected code
(which might be your part number, or a shorter code that corresponds with your long part number) - 'All Codes' generates multiple report worksheets with the click of a single button
One sheet for 'All Rows', and separate sheets for every part number that you defined in the 'Show' column on your DV sheet
As of May 2019, you have the option to Skip Status Codes that begin with 'X-'
For example, X-Expired, or X-Obsolete, or X-Exclude
Make these Work Instructions easily available
These Job Instructions need to be EASILY accessible to the workers that need them.
If short...
the entire report might be laminated and taped to the wall in front of the worker, so that he or she can easily glance at it whenever needed.
If longer...
the report pages might be put in clear plastic sleeves in a three-ring-binder mounted in a way that allows the worker to easily flip pages.
or be made available in PDF format — so pages can be displayed on a computer screen.
If even longer...
then it is often wise to consider breaking the process into shorter sub-processes.
If this is a controlled document
perhaps ISO 9000 or FDA or any other type of controlled document
Controlled documents (usually) need to be in a non-editable format (such as printed paper or a PDF)
Use your Systems2win Excel template to create and edit the document, and then either print it, or create a PDF to distribute to your users.
Advanced Training
for your Work Instructions Template
Revision Control
Use the Revision Log ('RevLog' worksheet) to summarize changes over time
Whenever you make a change to a workbook that has a Revision Log:
- Make an entry in the 'RevLog' sheet.
- Save an archive copy of all old versions of your document
following your company's Document Storage and Naming conventions.
And ALL related documents need to be kept in sync:
This Visual Work, as well as any other process documentation, such as Standard Work, Layout Diagram, Standard Procedure, training videos, etc.
Long Processes
If possible — split them into smaller sub-processes — small enough for a worker to digest in a single training session.
Or perhaps have the worker learn a segment of the job, while the instructor completes some other aspects of the job for a while until the learner is ready to take on more.
Or perhaps the only option is a very long and attentive mentoring relationship — with close supervision for an extended time period.
Note: The licensed version supports a maximum of 500 Steps, and the Trial version is limited to 10 Steps.
Other Standard Work Templates
It is common for a single process to have multiple types of documents for standard work
ideally stored in a single folder - in order to avoid breaking hyperlinks between related documents - as described in our online training for suggested Document Storage and Naming Conventions
It is common to use a Cross Training Matrix
to keep track of who needs what training, and how are they coming with that?
Although your Work Instruction template has columns for user-defined fields, they are almost never used.
Why would you want to waste your valuable time re-inventing formulas when there is already a template that has all Standard Work Analysis formulas pre-programmed?
Continuously Improve
Use the scientific method
to continuously improve best practices
Establish a culture
where workers and process engineers work together to continuously improve methods to reflect the very best practices that can be scientifically proven to minimize time and cost while maximizing quality and safety.
When ANYONE has an idea
there needs to be a quick, thorough, and fair evaluation of their idea using the scientific method: hypothesize, test, analyze, implement, and extend.
If the proposed method proves to be better
then it should be taught to all other workers — so everyone can do it the better way.
Personalize your Work Instruction Template
Your leaders might have already personalized your master Work Instructions template for:
- Your desired Header fields
Do not delete, insert, or move... but you can hide:
* rows in the header section at the top of the (hidden) Template sheet
* columns in the ID Table on the DV sheetOptionally rename any header field
Following the instructions for how to edit text using User Substitutions
(Think hard before doing this. And bounce your ideas off from Systems2win first.)
- Your desired header that appears at the top of each printed page
The row at the bottom of the header fields is the row that will appear at the top of each page
Your personalizations
get found and transferred
each time you upgrade
- Your default dropdown lists (on the DV sheet)
Including the special fields for Default Row Height and Step Label
- Your own conventions for how to use colors, fonts, and shapes to communicate different types of information
Simply edit the User-Defined section of the Help sheet.
- Your personalized starting point for new rows
When your users use the button to 'Add Rows', the newly added rows will be copied from the master rows that you can personalize by simply unhiding the top rows in your (hidden) Template sheet.
(be sure to re-hide those rows before you publish your personalized master template)
You can even have more than 1 type of row.
Contact us to learn how.
- Shapes and icons (see below)
If the dropdown list is TRUE
(just to the right of Favorite Shapes)then your Favorite Shapes on your (hidden) Template sheet will be automatically found and transferred each time that you upgrade.
And you can also personalize the shapes that are available when using any Excel document, by following the instructions below.
Personalize your own palette of icons
because pictures are better than words
Your Systems2win templates come with features to make it easy to personalize your templates
to make it easy for your users to quickly find and open your personalized palette of icons. Learn how.
Link to your own palette of icons
Studies have proven that our brains read and interpret the meaning of pictures and symbols much more quickly and accurately than words.
This is especially true when instructions are being communicated to people that speak different languages.
Examples of icons that can be
purchased separately, and then
used with your Systems2win templates
Systems2win provides a few safety icons to get you started, and some of our customers also purchase or create their own set of symbols for things like safety icons, hazardous materials, equipment, tools, and anything else that is better communicated through symbols rather than words.
Once you have purchased or created your own set of icons that are appropriate for your unique industry and needs, then you can easily copy & paste them into any Systems2win template.
A quick Internet search for "safety icons" will lead you to several web sites where you can choose from a wide variety of symbols to meet your unique icon needs for safety, tools, equipment, materials, supplies, and anything else that is better communicated with pictures rather than words.
Let us help you
Once you have followed the usual instructions for how to personalize your Systems2win templates
before you distribute your personalized template to your users, it is a good idea to email it us for a (free) final review.
"Amateurs work until they get it right. Professionals work until they can't get it wrong."
Contents
Process Improvement
Q and A
Ask us a question and see answers to common questions about process improvement.
Systems2win
Excel templates are available
in ANY language
Languages available for immediate delivery include:
French:
Instructions de tâches
Spanish:
Instrucciones de trabajo
Portuguese:
Instruções de Trabalho
German:
Arbeitsanweisungen
Chinese:
作业说明
Training and Coaching
Consider Training and Coaching to support your teams to succeed
Training to get you started.
Tools you won't outgrow.
Schedule a Conference
Schedule a conference
to discuss your challenges
with an experienced lean advisor